One of the best ways to keep your pooch happy and healthy is to provide her with activities that exercise both her body and mind — like puzzle feeders and puzzle treat dispensers.
These cool gizmos won't dispense the noms until the dog figures out how it's done. Puzzle feeders are especially great for dogs who tend to guzzle their chow faster than they should (which could cause health issues). Problem is, puzzle feeders can cost a pretty penny. However, with some basic woodworking skills (can you use a drill?) and cheap materials, you can make an awesome spinning bottle feeder that'll slow down fast eating and boost your dog's brain power!
Video of the Day
Things You'll Need
1 wood board at 3/4 inches x 11 inches x 18 inches
2 wooden planks at 3/4 inches x 3 1/2 inches x 18 inches
1 round wood dowel, 3/4 inch diameter x 18 inch length
1 round wood dowel, 3/8 inch diameter x 18 inch length
1 - 3 empty plastic bottles depending on how much food you'd like the feeder to dispense
(size of your choice, but 1/2 - 1 liter bottles work well)
Measuring tool
PencilPower drill
Spade drill bits for: 3/4 inch diameter hole and 1/2 inch diameter hole
Wood glue
Wood screws or nails (optional)
Pocket hole jig kit and pocket hole screws (optional)
Block sander or sand paperNon-toxic paint (optional)
Treats and/or food your dog loves
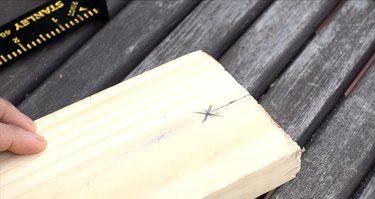
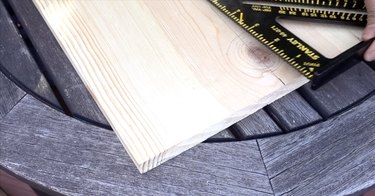
Step 1: Mark Planks
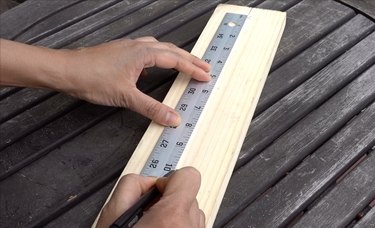
With your measuring tool and pencil, mark the midpoint on both ends of each plank with a line. Then mark the exact point 1 inch down from the midpoint on one end of each plank (I marked with an X).
Then, mark another point 10 inches down from the first mark (that is, 11 inches down from the top edge). Do this on both planks.
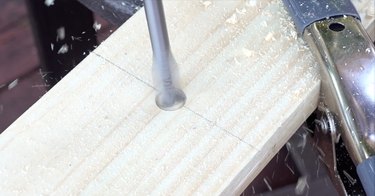
Step 2: Drill Holes
Using your drill and 3/4-inch spade bit, drill a 3/4-inch diameter hole at the first mark 1 inch down from the edge.
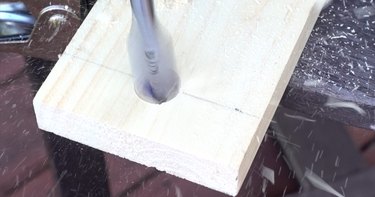
Using your drill and 1/2-inch spade bit, drill a 1/2-inch diameter hole at the second "X."
Repeat this step for the second plank.
We highly advise that you securely clamp your wood to a fixed object such as a stable work table when drilling. Always exercise caution and common sense when using power tools.
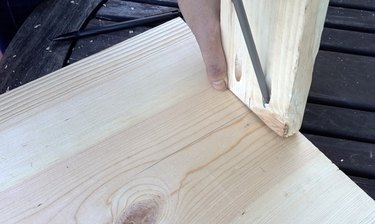
Step 3: Attach First Plank to Base
Before joining the first plank to the base, mark the midpoints on the short sides of your board.
Line it up with the midpoint on one of the planks and screw or nail together. As shown below, I pre-drilled pocket holes using a Kreg pocket hole jig, but you can also use wood glue and then nail from underneath.
Step 4: Attach Stabilizer Dowel And Second Plank
Apply an even coating of wood glue to the end of the 3/4 inch dowel, and fit it into the corresponding 3/4 inch hole in the plank you just connected to the base. This dowel will provide upper stability to the puzzle feeder.
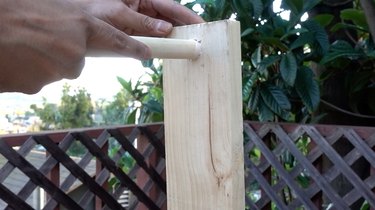
Now do the same with the dowel's other end and the second plank.
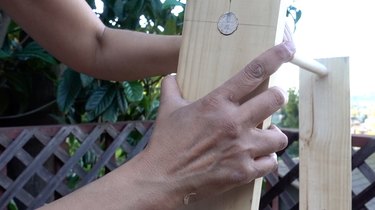
Complete this step by attaching the second plank to the base as you did in the third step.
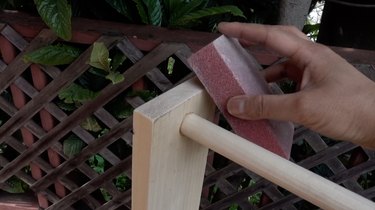
Step 5: Sand
To prevent you and your pooch from getting splinters and/or scratched, sand down the entire puzzle, concentrating on sharp edges and corners.
Step 6: Paint (Optional)
If you'd like, use a non toxic paint such as milk paint or child/pet-safe acrylic craft glue to decorate your puzzle as desired.

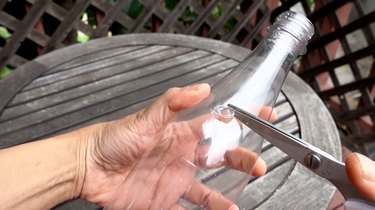
Step 7: Cut Holes In Bottles
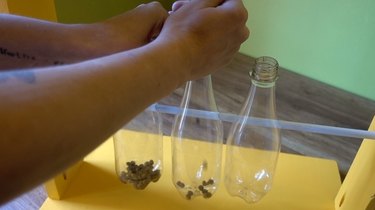
Using a sharp pair of scissors, cut two holes approximately 1/2 inch in diameter in each bottle directly opposite from the other so that the 3/8-inch dowel can be inserted through. Note that the holes should be slightly larger than the dowel allowing them to rotate freely when spun. Also, make sure to cut your holes closer to the top of your bottle so that there is slightly more weight at the bottom so that it hangs upright.
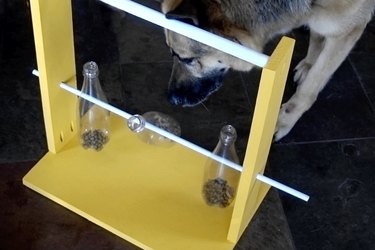
Step 8: Assemble And Add Yummy Food
Insert one end of the 3/8-inch dowel into one side of the puzzle feeder and slide on the bottles.

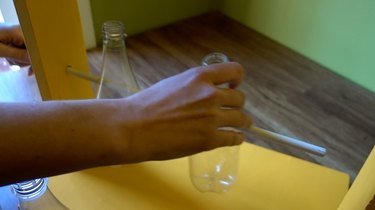
Finally, put your pooch's favorite food or treats into the bottles.
Your DIY spinning bottle dog puzzle is now ready to put your pup's cognitive skills to the test!
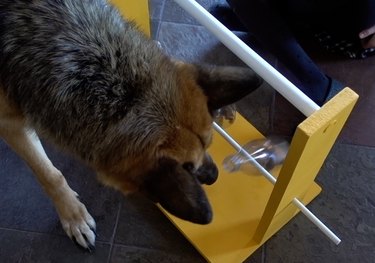
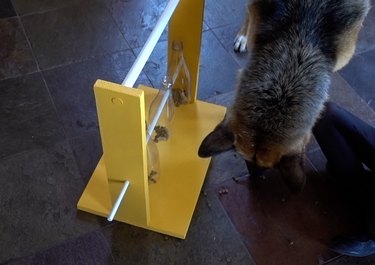
We put a cute little floof to the test. Watch how much fun he has!
Did you make this spinning-bottle puzzle for your pooch? Share a photo in the comments!