Things You'll Need
One sheet of untreated 3/4-inch plywood
Five 1-by-4-by-8s, untreated
Sandpaper, 80 grit
Circular saw
Measuring tape
Power screwdriver
Wood screws, 1/2-inch, 2 1/2-inch length
Angle ruler
Pencil
Large clamps
Rubber mallet
Level
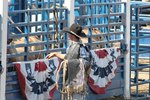
Custom metal bar half door
Two large hinges and accompanying hardware
Slide bolt latch and accompanying hardware
Warnings
Keep tools and saw away from children.
Wear protective eyewear when operating saw.
Tips
If your horse stall has metal bars, your top half door may not need them. Consider creating a full door by repeating all steps to make two half doors. This would allow you to open the top half of the door occasionally while you are in the barn, and would avoid the expense of customized metal bars.
No matter how cute your horse might look with his head hanging out of his stall, a full door is the best option for your equine pal. Many horses are prone to cribbing, the act of placing their top teeth on a stationary object and inhaling air, which can lead to colic and tooth wear. A Dutch or half door can promote cribbing, but two half doors with metal bars on top may reduce this.
Measure the opening for your door. Note both height and width.
Measure your plywood according to the notes you took in step 1. Your plywood piece should fill the entire width and half the height or more, depending upon the size of your metal bar half door. You can preorder your metal bar half door or have a welder customize it. The bars need to be sturdy, protective and made of steel or aluminum. Unless you're an experienced welder, it is best to have this section of your door customized.
Cut your plywood according to the measurements you took in step 2, allowing for the portion of your door that will be filled with your finished metal bars. Sand to remove any rough edges.
Measure your 1-by-4-by-8s so they will line the outer edge of your plywood. For instance, if your plywood is 4-by-4, measure eight pieces of 1-by-4-by-8 into 4-foot sections. You would be cutting four of the boards in half to create eight pieces.
Cut your 1-by-4-by-8s using the circular saw. Sand to remove any rough edges.
Using the angle ruler, pencil in a 45-degree angle onto the end of each of the eight pieces of 1-by-4-by-8.
Cut the angled marks using your circular saw.
Lay out your plywood on a flat surface. Edge the plywood with the cut 1-by-4-by-8 sections, which you prepared and angled. Make sure all corners meet. On the underside of your plywood, add the remaining four pieces of 1-by-4-by-8 in the same fashion. You'll need to clamp these as you go. Don't clamp too tightly, as you may need to tap these into place with your rubber mallet to make sure everything lines up.
Attach the 1-by-4-by-8s that you've clamped onto the plywood using the wood screws and power screwdriver. Attach a screw every few inches to both the top and bottom of the 1-by-4-by-8 pieces to ensure stability. Be sure to sink the screws to avoid injury to your horse.
Measure from the upper right inside edge of the square you've created on your plywood with your 1-by-4-by-8 edging to the lower left inside edge. Note this measurement.
Cut two pieces of 1-by-4-by-8 equal in length to the measurement you took in step 10. Sand to remove any rough edges.
Measure the width of the 1-by-4-by-8 you just cut and mark the center point at each end of both pieces.
Mark a 45-degree angle from this center point down each side. Your pencil mark should look like an upside down "V". Repeat on the other end, and repeat the entire step with the second piece you cut in step 11.
Cut each angled mark. Sand to remove any rough edges.
Insert these pieces into your plywood door running diagonally. You may have to tap them with the rubber mallet. Insert one piece into each side. Clamp at the corners to hold.
Secure the two diagonal pieces using the power screwdriver and wood screws.
Add your hinges and hardware using the power screwdriver and accompanying hardware.
Hang your door by attaching the other end of the hinges to the wood on the front of the stall. Use your level to make sure you hang your door properly. This will also ensure that your metal-bar half door will line up correctly when hung level.
Attach the slide bolt latch using the accompanying hardware.
References
Tips
- If your horse stall has metal bars, your top half door may not need them. Consider creating a full door by repeating all steps to make two half doors. This would allow you to open the top half of the door occasionally while you are in the barn, and would avoid the expense of customized metal bars.
Warnings
- Keep tools and saw away from children.
- Wear protective eyewear when operating saw.
Photo Credits
-
YiorgosGR/iStock/Getty Images