Make A Modern Cat Tree Out Of PVC Pipe
We may receive a commission on purchases made from links.
Cuteness may earn compensation through affiliate links in this article.
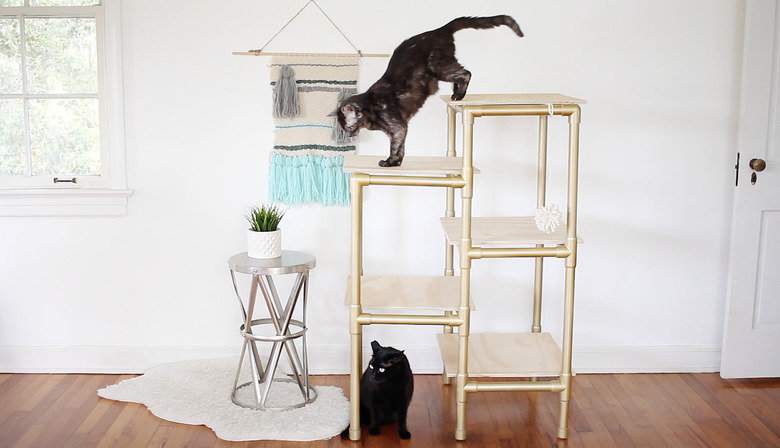
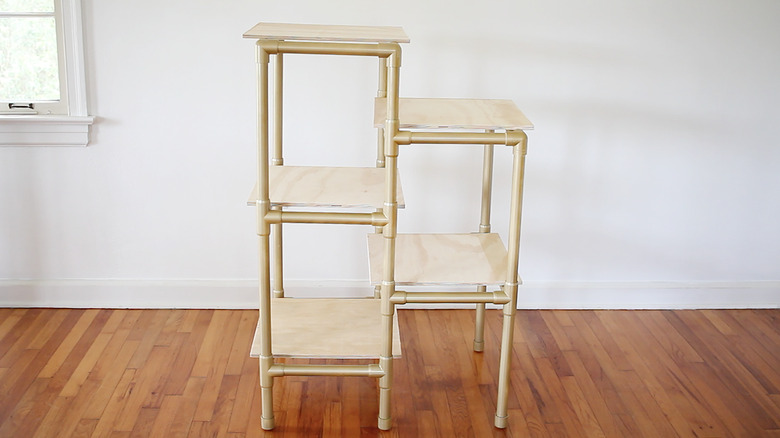
Skip the expense of carpet-covered cardboard cat trees you can buy at the store by creating your own modern version using PVC pipe. Not only will you save money, but you'll add some serious style to your living space. Your lucky kitty will have a sturdy yet sleek space to nap, play, and exercise.
 Trisha Sprouse
Gather your supplies
Gather your supplies
Head to your local or hardware store to gather the following supplies.
- 1-inch PVC pipe, 40 feet
- PVC pipe cutter or hacksaw
- 1-inch furniture-grade 4-way Tee PVC fittings, 14.
- 1-inch furniture-grade 3-way PVC elbows, 6
- 1-inch PVC end caps, 4
- 1-inch 2-hole pipe straps
- 1/2-inch screws, 20
- 1/2-inch plywood (enough to make five 18" x 18" boards)
- Power drill
- PVC cement
- Spray paint (optional)
Although plain white PVC pipe and fittings are easy to find in your local big box hardware store, you can add even more flair by ordering FORMUFIT Furniture Grade PVC Pipe and PVC Fittings online.
Tip: You may be able to find the 3-way PVC elbows in most big box hardware stores, but if 4-way fittings will likely be hard to find. I ordered [these](https://www.amazon.com/dp/B00MNIZMBO?&linkCode=ll1&tag=cuteness-web1-20&linkId=da949cb61b65d431afc32bf531fe3a34&language=en_US&ref=as_li_ss_tl) online from Amazon. Be sure to get furniture-grade fittings for both the 3-way and 4-way connectors. Also, ask the hardware store to cut the plywood into five 18" x 18" boards for you._
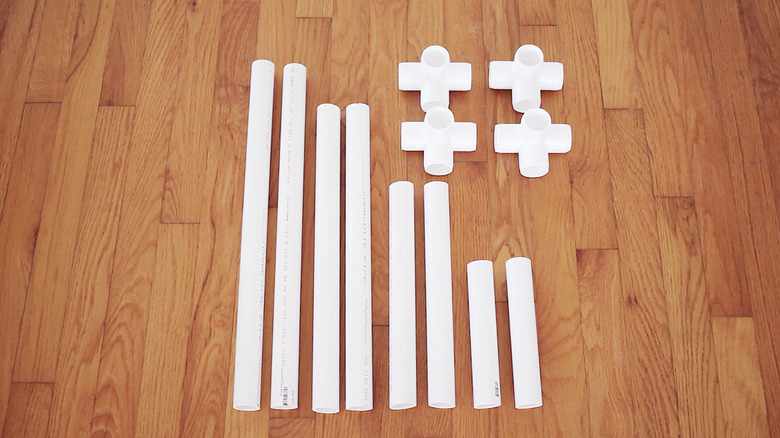
Step 1: Cut the pipes
Step 1: Cut the pipes
Use a PVC pipe cutter to cut the PVC pipe into the following lengths:
- 19.5 inches x 10 pipes
- 17 inches x 6 pipes
-
- 5 inches x 2 pipes
- 12 inches x 10 pipes
- 7.5 inches x 8 pipes
- 6 inches x 4 pipes
Smooth and wipe away any burrs or dust that remain on your PVC pipe to ensure an airtight fit when you glue.
 Trisha Sprouse
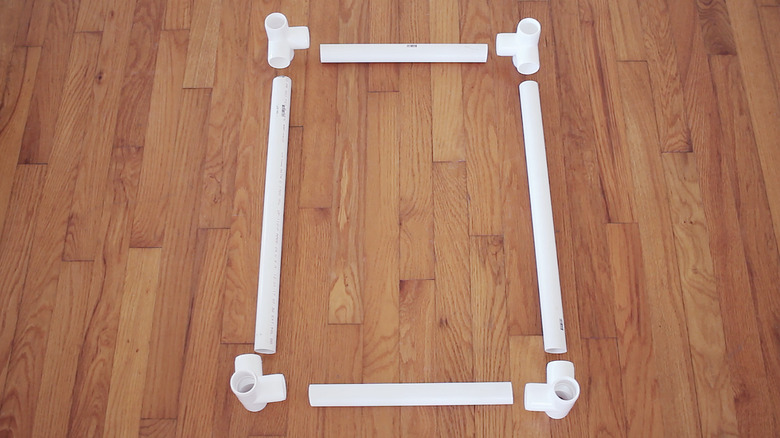
Step 2: Assemble the first level
Step 2: Assemble the first level
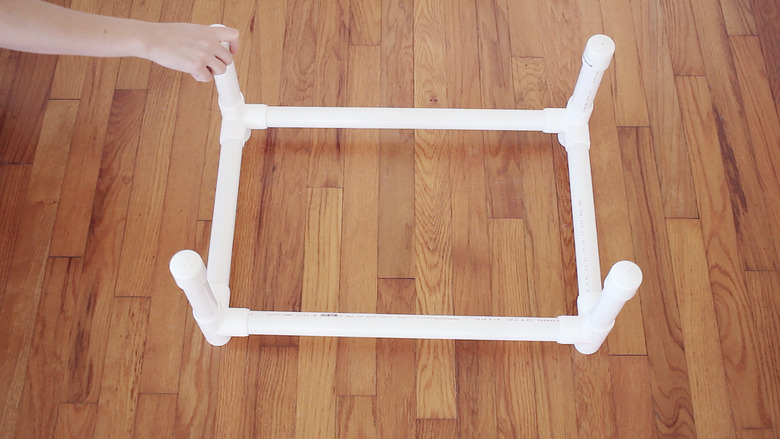
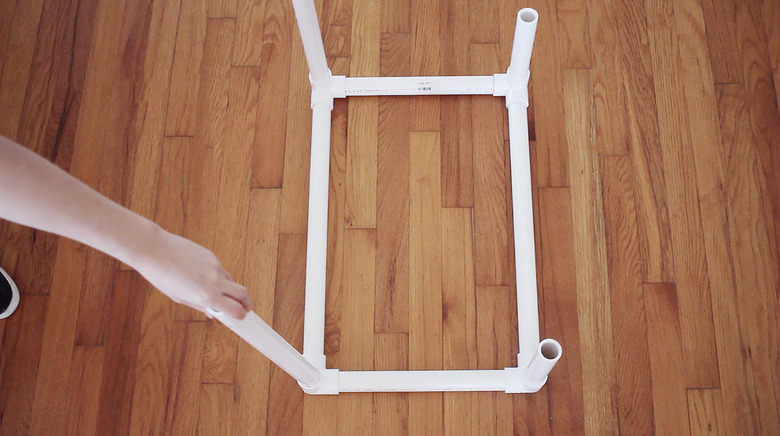
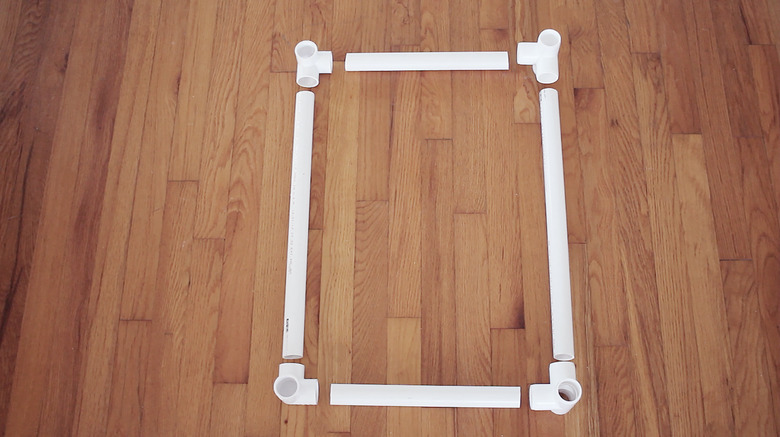
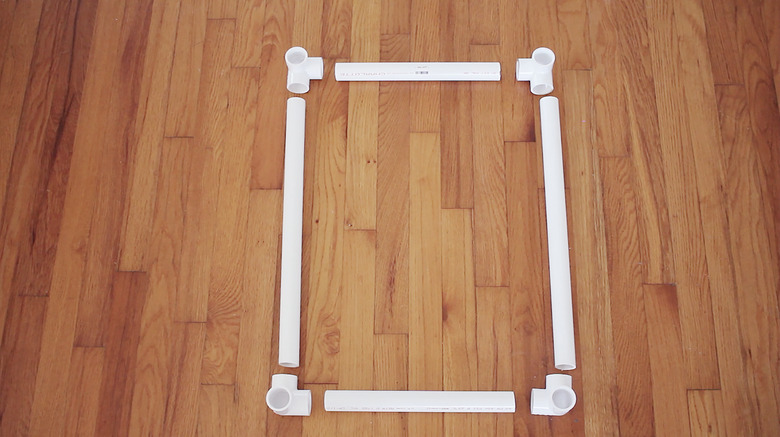
Two 19.5-inch pipes form the long sides of the rectangle, two 12-inch pipes form the short sides of the rectangle, and a 4-way connector secures each corner as shown. Do a dry-fit of all pieces before gluing to make sure everything fits together correctly and is cut to the right length.
 Trisha Sprouse
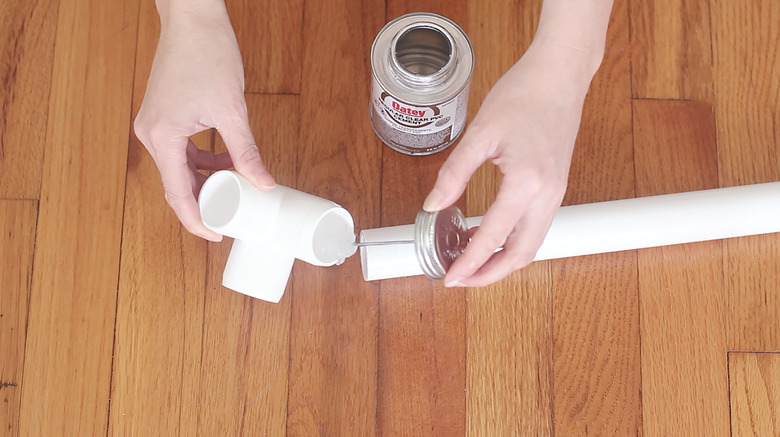
Apply PVC cement — Black Swan Manufacturing 7079 Wetordry PVC Cement works well — to each connector and pipe end as you fit the pieces together. For the most secure bond, make sure to remove all the plastic burrs from the pipe ends that you'll be fitting and apply a primer to both the inside of the fitting and the outside of the pipe. You'll have approximately 10 seconds between applying the primer and having to apply the cement, so work quickly on one piece at a time.
 Trisha Sprouse
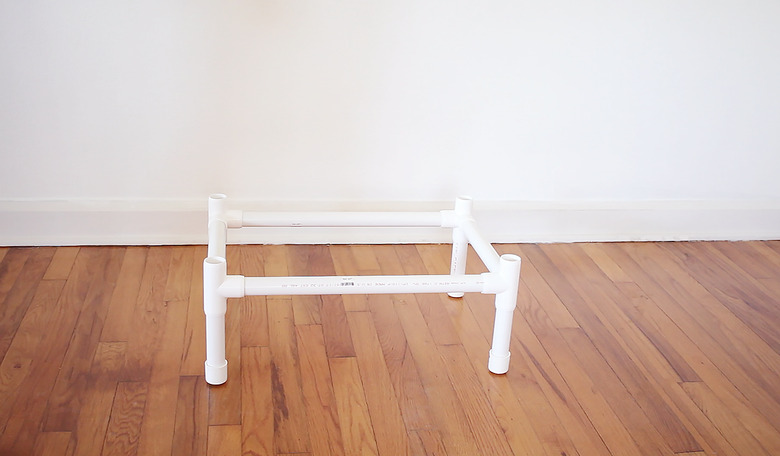
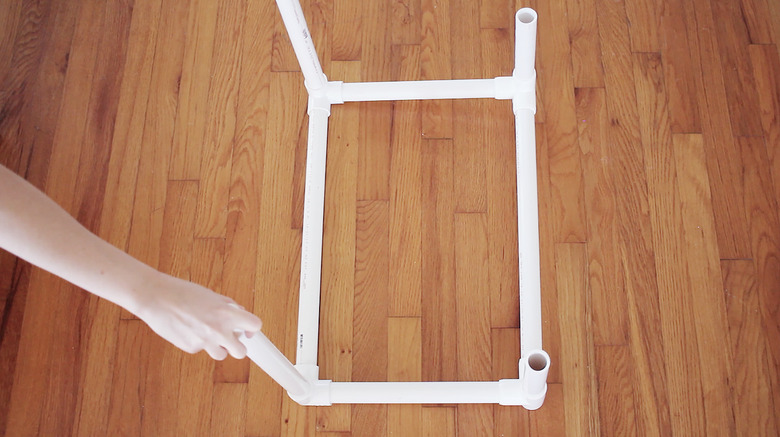
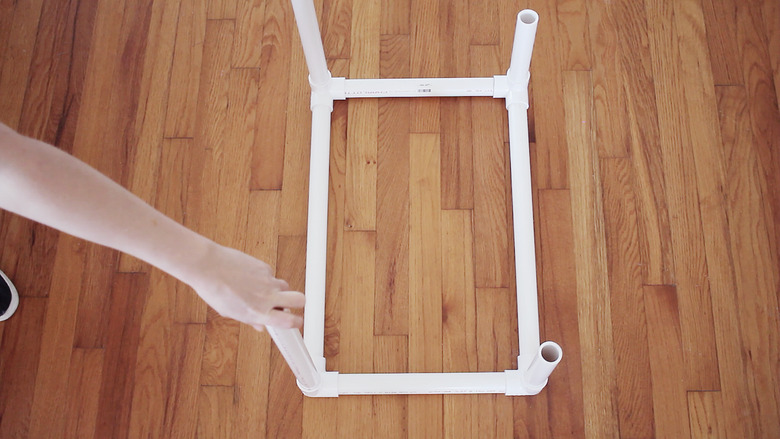
Next, insert a 6-inch pipe into each of the four corner connectors and place end caps on all four pipes. Be sure to prime and glue each piece together as you go.
 Trisha Sprouse
Once assembled, flip the piece over so it's standing on all four caps.
 Trisha Sprouse
Step 3: Assemble the second level
Step 3: Assemble the second level
You'll need two 19.5-inch pipes to form the long sides of the rectangle, two 12-inch pipes to form the short sides of the rectangle, and a 4-way connector in each corner. Glue as you go.
 Trisha Sprouse
Insert two 15.5-inch pipes into two of the connectors on one side of the rectangle, and then insert two 7.5-inch pipes into two of the connectors on the other side of the rectangle as shown. Place an end cap on both 15.5-inch pipes.
 Trisha Sprouse
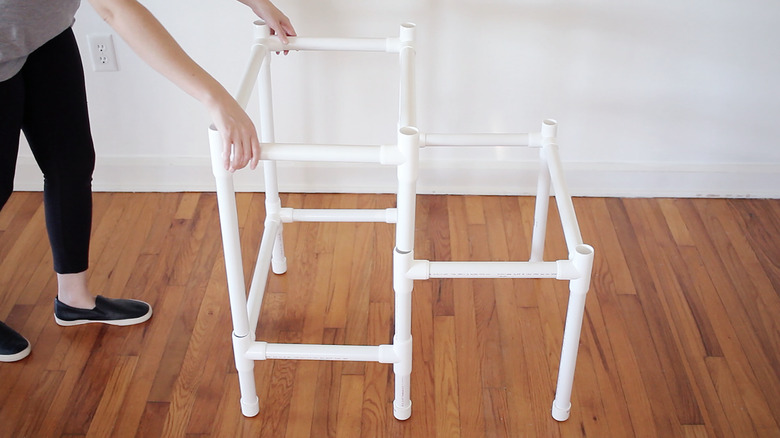
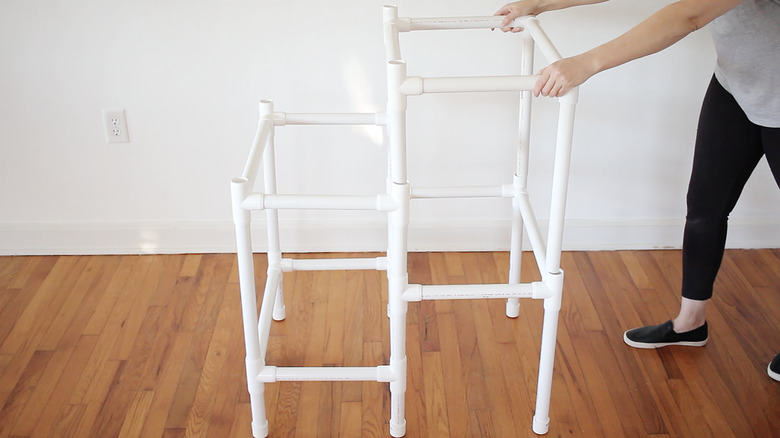
Once assembled, flip the piece over and insert the 7.5-inch pipes into the connectors on the first level of the cat tree. The 15.5-inch pipes should touch the ground.
 Trisha Sprouse
Step 4: Assemble the third level
Step 4: Assemble the third level
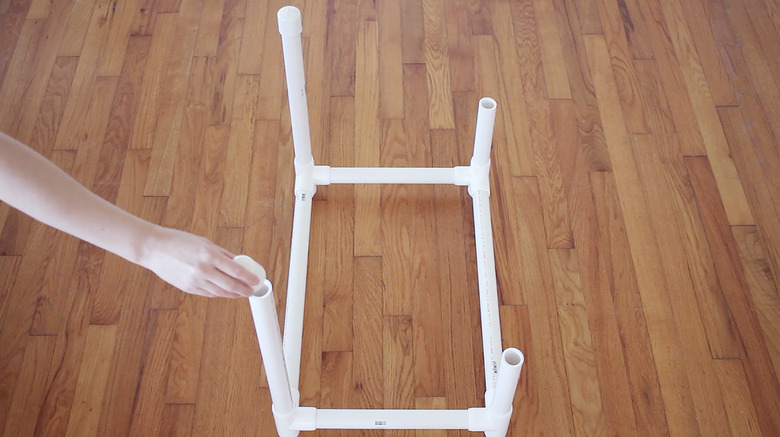
You'll need two 19.5-inch pipes to form the long sides of the rectangle, two 12-inch pipes to form the short sides of the rectangle, and a 4-way connector in each corner. Glue as you go.
 Trisha Sprouse
Insert two 17-inch pipes into two of the connectors on one side of the rectangle, and then insert two 7.5-inch pipes into two of the connectors on the other side of the rectangle as shown.
 Trisha Sprouse
Once assembled, flip the piece over and insert the 7.5-inch pipes into the connectors on the second level of the cat tree. Insert the 17-inch pipes into the connectors on the first level.
 Trisha Sprouse
Step 5: Assemble the fourth level
Step 5: Assemble the fourth level
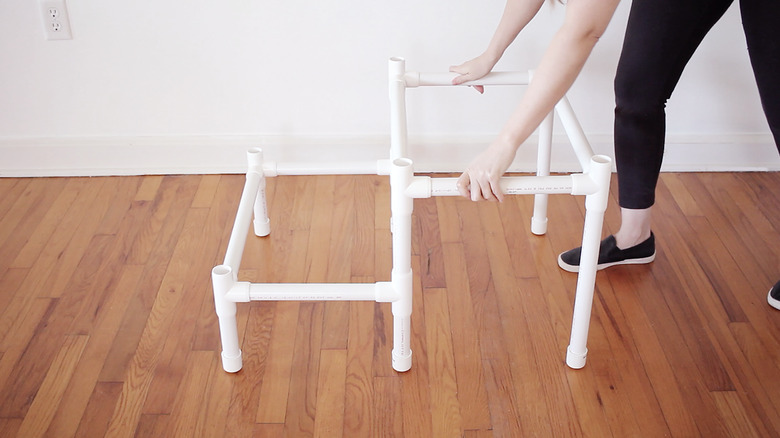
You'll need two 19.5-inch pipes to form the long sides of the rectangle, two 12-inch pipes to form the short sides of the rectangle, two 3-way connectors in two corners and two 4-way connectors in two corners. Glue as you go.
 Trisha Sprouse
Insert two 17-inch pipes into two of the connectors on one side of the rectangle, and then insert two 7.5-inch pipes into two of the connectors on the other side of the rectangle.
 Trisha Sprouse
Once assembled, flip the piece over and insert the 7.5-inch pipes into the connectors on the third level of the cat tree. Insert the 17-inch pipes into the connectors on the second level.
 Trisha Sprouse
Step 6: Assemble the fifth level
Step 6: Assemble the fifth level
You'll need two 19.5 inch pipes to form the long sides of the rectangle, two 12-inch pipes to form the short sides of the rectangle, and a 3-way connector in each corner. Glue as you go.
 Trisha Sprouse
Insert two 17-inch pipes into two of the connectors on one side of the rectangle, and then insert two 7.5-inch pipes into two of the connectors on the other side of the rectangle.
 Trisha Sprouse
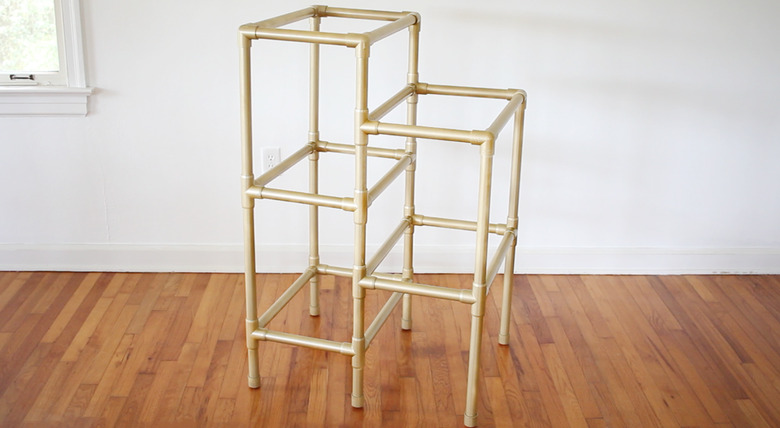
Once assembled, flip the piece over and insert the 7.5-inch pipes into the connectors on the fourth level of the cat tree. Insert the 17-inch pipes into the connectors on the third level.
 Trisha Sprouse
Step 7: Paint the pipes
Step 7: Paint the pipes
This is optional, but if you plan to paint the cat tree, you'll want to spray paint the pipes now. Be sure to spray outside or in a well-ventilated area, and protect the surrounding surface areas with a tarp or newspaper. Allow complete drying time in between coats.
 Trisha Sprouse
Step 8: Attach the wood boards
Step 8: Attach the wood boards
Place an 18" x 18" wood board on each level of the cat tree. Your hardware store may cut them for free, or you can order project panels such as Woodcrafter 3/4" Thick Baltic Birch Plywood Square 18 Inch online.
 Trisha Sprouse
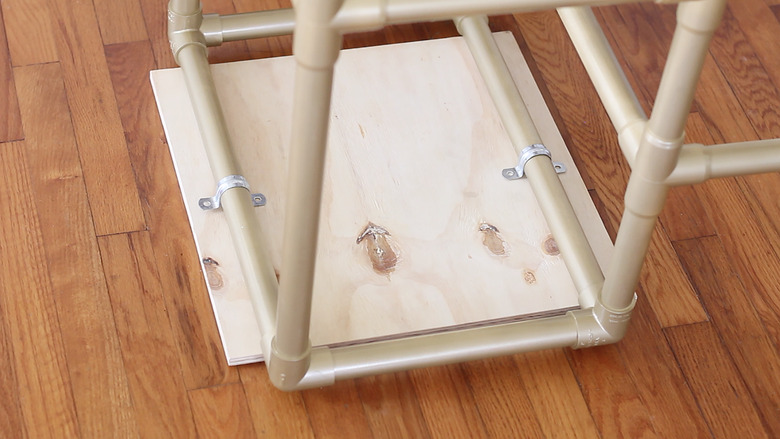
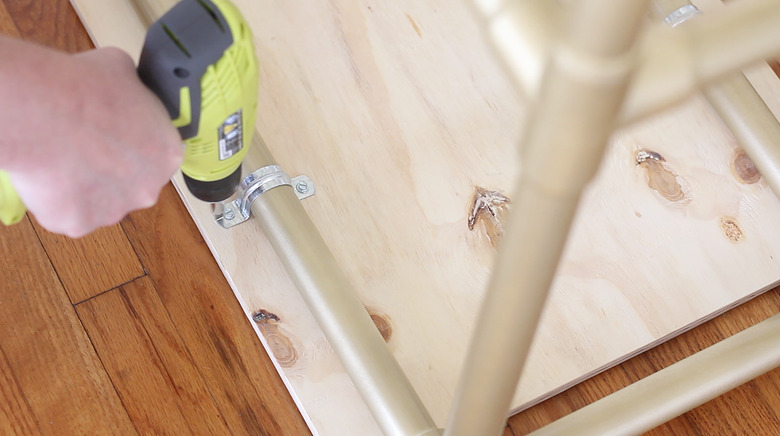
Secure each board to the pipes with pipe straps and 1/2-inch screws. You'll need at least two pipe straps per board (one on each side).
 Trisha Sprouse
Be sure the screws don't go all the way through to the other side of the wood.
Tip: You may find it easier to flip the cat tree over and attach the boards upside down.
 Trisha Sprouse
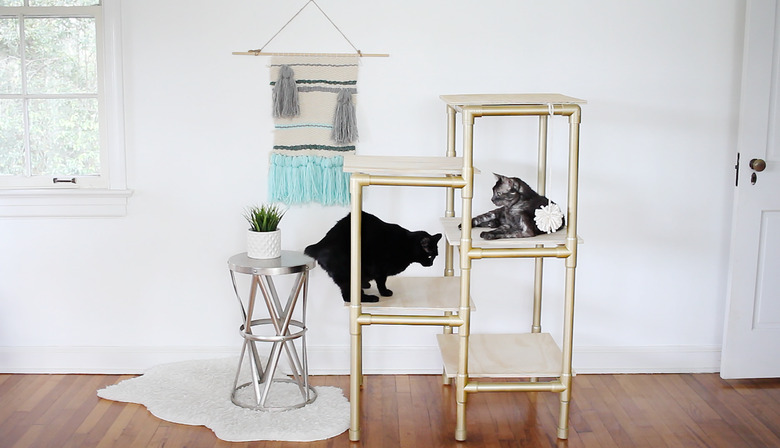
Hang a couple of pompoms or feathers if you'd like, and you're done!
 Trisha Sprouse