How To Build Your Own Fish Tank
Things Needed
-
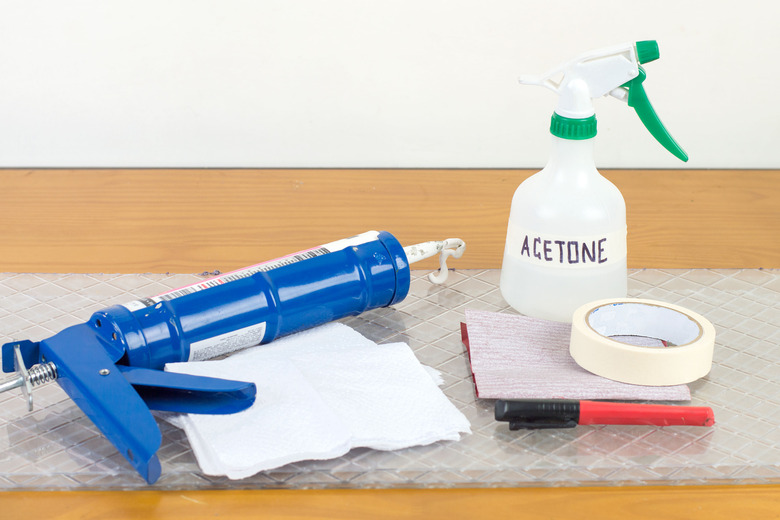
5 pieces of 1/2 inch thick glass or acrylic
-
Silicon sealant (100 percent silicon and non-toxic)
-
Silicon carbide sandpaper
-
Acetone
-
Paper towels
-
Duct tape
-
Washable felt-tipped marker
Warning
Do not use glass or plexiglass that is thinner than 1/2 inch. Do not place fish or other animals into your new aquarium until you've fully established biological filtration.
Tip
Building your own fish tank doesn't necessarily have a cost advantage over buying a tank, however, it allows you to have a custom tank designed to fit a specific area of your home or office. Place a piece of fabric, such as an old blanket or towel, underneath your new tank before filling it with water to make it easier to identify leaks.
Building your own fish tank can give you a sense of accomplishment on several different levels. Not only is it a gratifying experience, but you can make a fish tank that is customized to fit a specific area. While you can hypothetically build a fish tank of any shape, these instructions are for a square or rectangular aquarium. Adjust them as necessary for custom shapes.
Set Up
Step 1
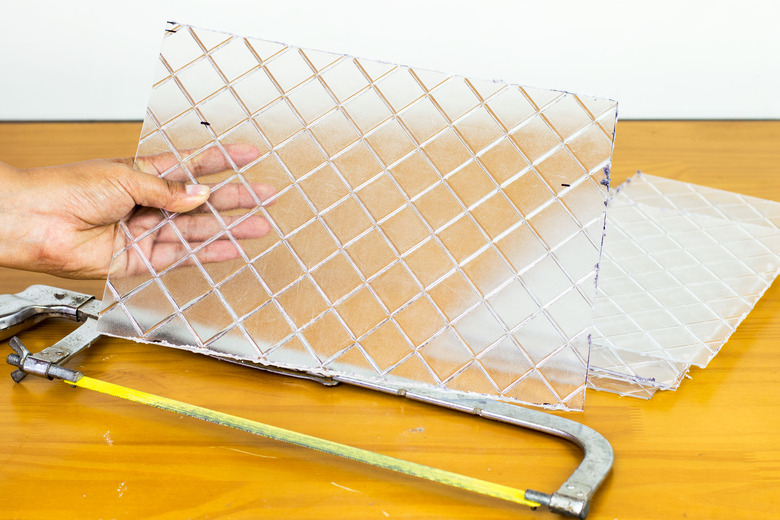
Determine what size fish tank you would like to build and whether you will make it out of glass or plexiglass. Plexiglass is a clear, impact-resistant plastic. For safety reasons, glass tanks must not exceed 36 inches in height and plexiglass tanks have a 30-inch height maximum. Keep in mind that the side pieces will be attached on top of the bottom piece, which will remove 1/2 inch of space from each side of your aquarium floor.
Step 2
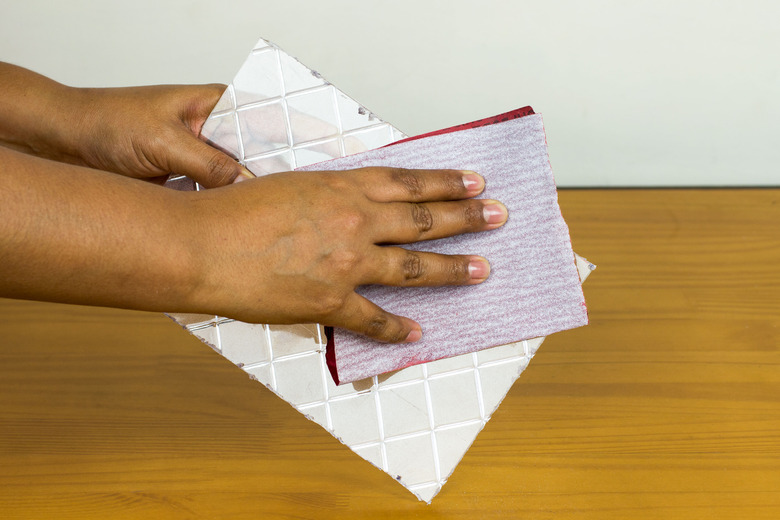
Use the silicon carbide sandpaper to sand the edges of the glass, filing down any sharp or jagged edges.
Step 3
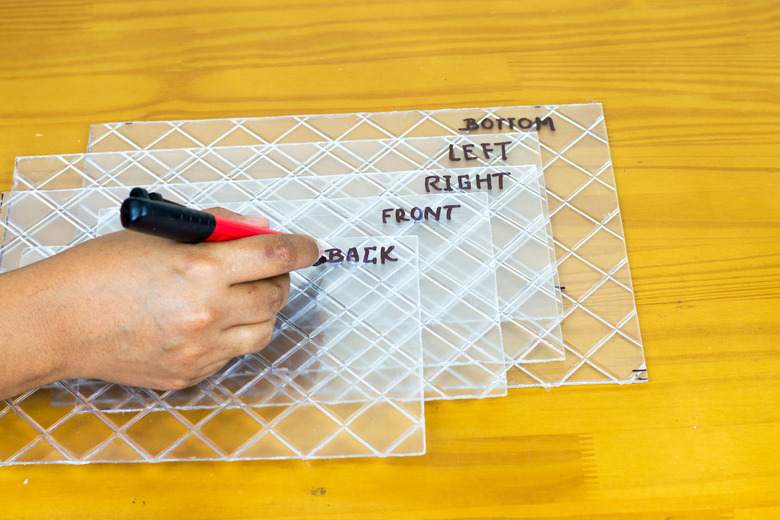
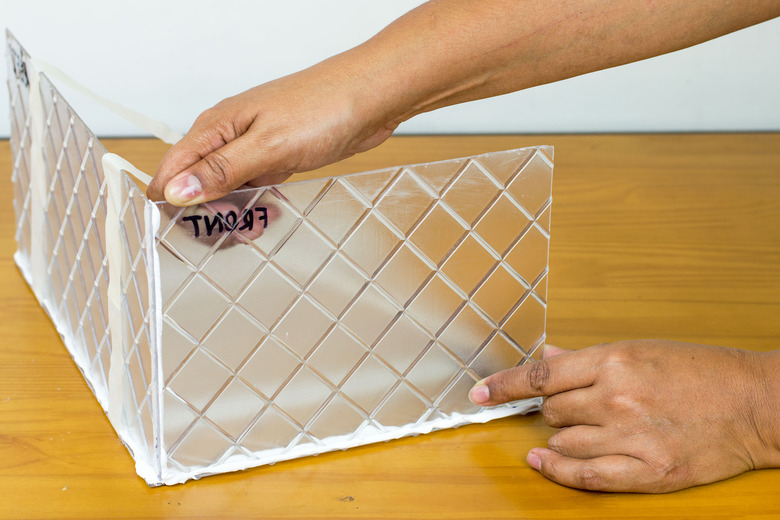
Lay out all the pieces of glass or plexiglass so you can identify which pieces will make up each side and which will be the bottom. Use a washable felt-tipped marker to write on the glass and identify the bottom, front, back, left and right sides. Mark the interior plane, top and bottom edge of each wall.
Step 4

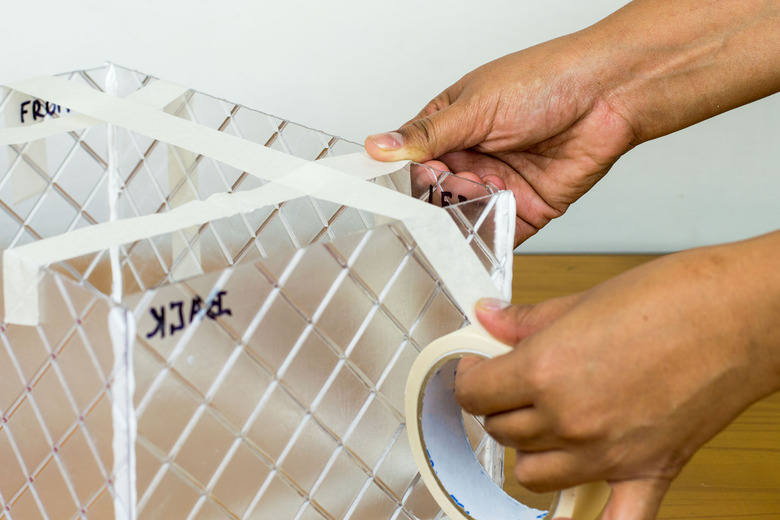
Tear off 15 to 20 5 to 6 inch strips of duct tape. Place the piece of glass designated "bottom" on the workspace in front of you with its inside portion facing up. Splash a little acetone on a paper towel and clean the edges of the glass.
Step 5
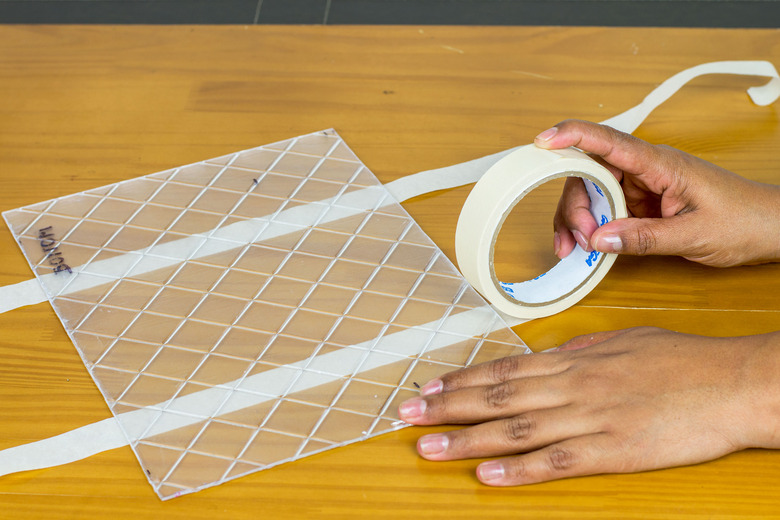
Place eight of your duct tape strips halfway under the fish tank's bottom with the sticky sides facing up. Place two strips on each side of the tank bottom, evenly spaced.
Attachment
Step 1
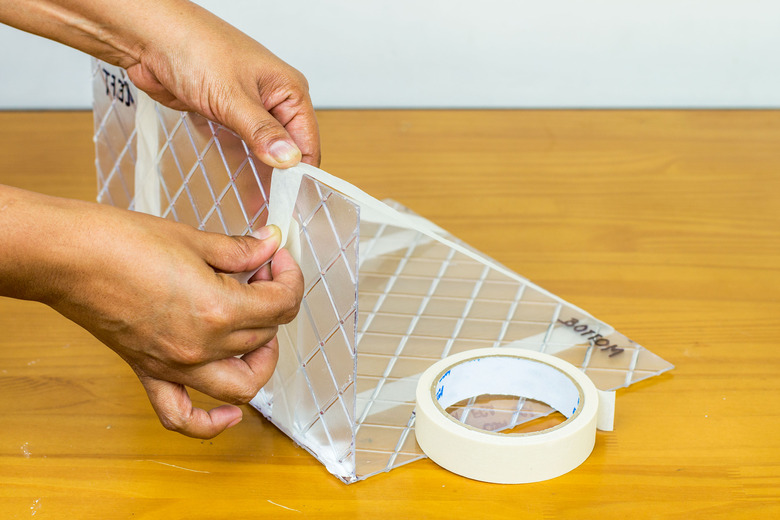
Run a bead of sealant down the length of the front of the fish tank along its bottom edge. Press this side firmly down onto the bottom, sandwiching the silicon sealant between the bottom and the wall. Secure the duct tape strips. Do not wipe away sealant that leaks out under the edge.
Step 2
Run a bead of silicon sealant along the bottom edge of the right or left side of the tank. Run another bead of sealant down the side of the plate where it will join the front of the tank.
Step 3
Set the side panel in place, pressing it firmly against the bottom and the front side. Hold the glass in place and secure the two tape strips from the bottom of the fish tank. Take two new tape strips and secure them across the corner where the front and side meet.
Step 4
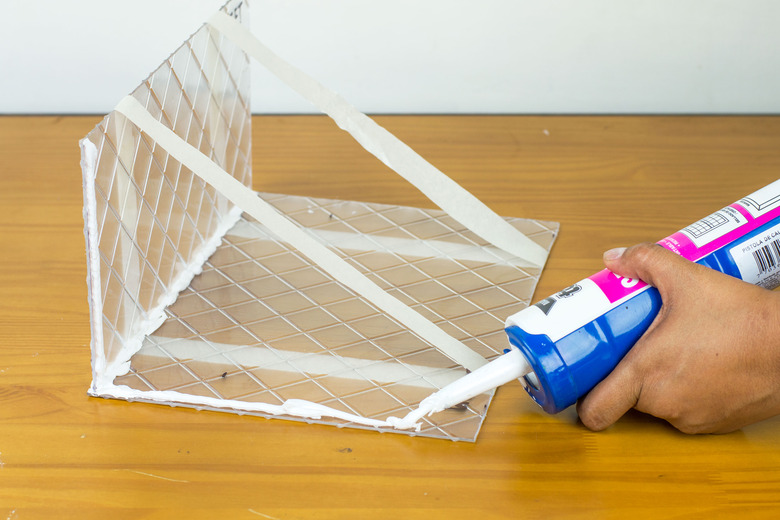
Repeat this process until all four sides of the fish tank are secured to the bottom and to one another.
Step 5
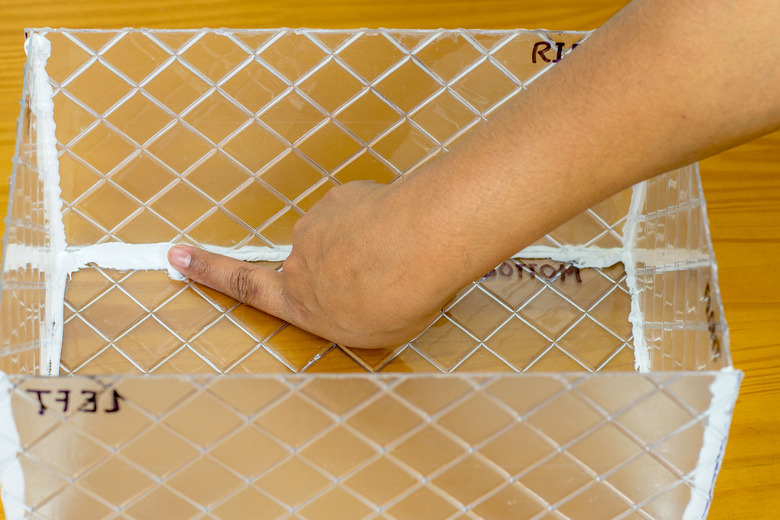
Run a small bead of sealant across each inside edge. Use your finger to smear it into the joints. Let the sealant set for at least 48 hours or until no odor remains.
Step 6
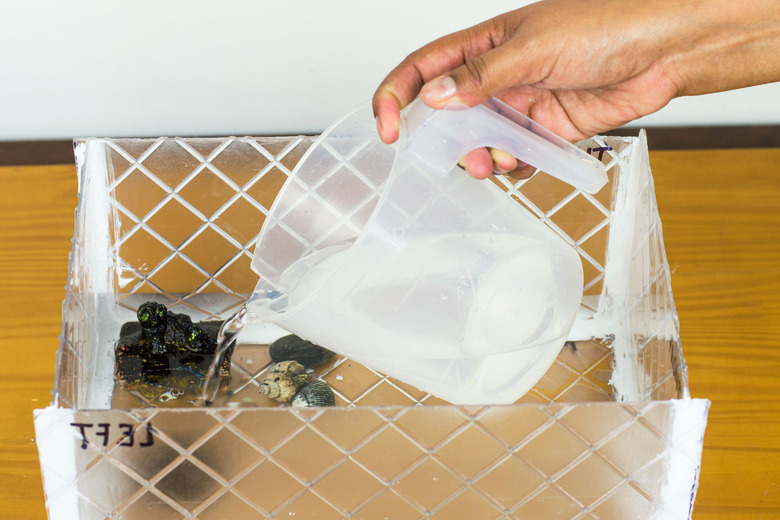
Fill the tank with water and allow it to sit for at least 24 hours. Check the outside of the tank periodically for any leaks forming in the joints. If the fish tank holds water for 24 hours without developing a leak, it is ready for use.