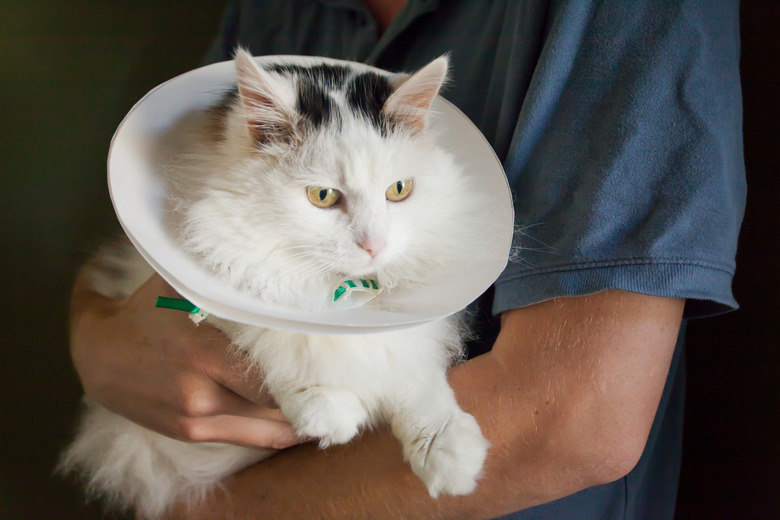
How To Make A Soft Elizabethan Collar For Cats
An Elizabethan collar, also known as an e-collar, is a protective device that prevents your cat from licking and scratching his back, neck, or head. These collars are helpful when your cat is recovering from surgery or has a skin irritation because they prevent your cat from irritating the areas by scratching or licking. You can purchase an Elizabethan collar at your vet's office or a local pet store, but they can be expensive and rigid. Plus, correct fit is important.
The answer to saving money and custom fitting your cat is a homemade cat cone. DIY cones for cats are possible and are not that hard to make. Plus, if you use a thin, foam sheet available at major craft stores, the cone will be softer and more comfortable. Once you're done, remember: Homemade cones can also be made for dogs!
How to make a soft homemade cat cone
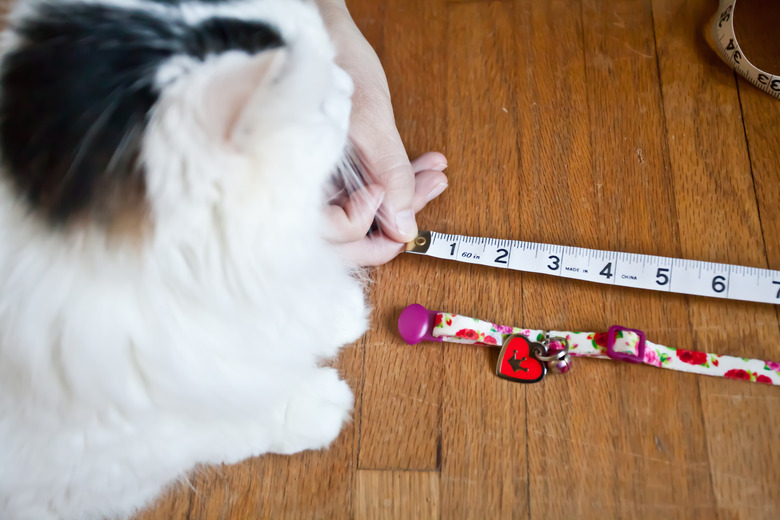
1. Obtain a measurement for the cone's length
After putting a collar on your cat, use a soft tape measure to measure from the tip of your cat's nose to where the collar rests. Add an inch to this measurement. This will give you the height of your DIY cat cone.
It's important to get as accurate of a measurement as possible in order to make the best e-collar for your cat, so try to keep your cat still. Asking someone to distract your cat with a toy so the cat faces forward can help with this process if your cat is particularly busy.
The completed cone should barely come to your cat's nose. After you complete your homemade cat cone, if you discover you measured incorrectly and the e-collar is extending past the end of your cat's nose, you'll have to remove the entire device and cut down the edges accordingly. Avoid unnecessary adjustments by measuring carefully at this step.
2. Obtain the neck opening measurement
Loosen your cat's collar so it easily slips on and off your cat's head without falling off on its own. Remove the collar and measure its length. Add 1/2 inch to this measurement. This will be the diameter of the opening of the Elizabethan collar.
Because the Elizabethan collar is attached to your cat's collar, it is in a suspended state. This means when your cat leans forward to eat and the collar meets resistance from her bowl, it will push back, allowing your cat to eat or drink.
3. Cut the outer and inner circles
It's best to complete the first cone using cardboard and then lay the pattern you've made onto a foam sheet and cut out the sheet. This is a good idea because if your soft foam cat cone becomes worn, instead of measuring again to make a new one, use the cardboard as a template.
Place the pencil inside the measuring compass. Set the compass to the nose-to-collar measurement. Draw a circle on the poster board (if you're creating a pattern) or foam sheet (if you only want the cone). This will give you the guidelines for the general shape of your cat cone.
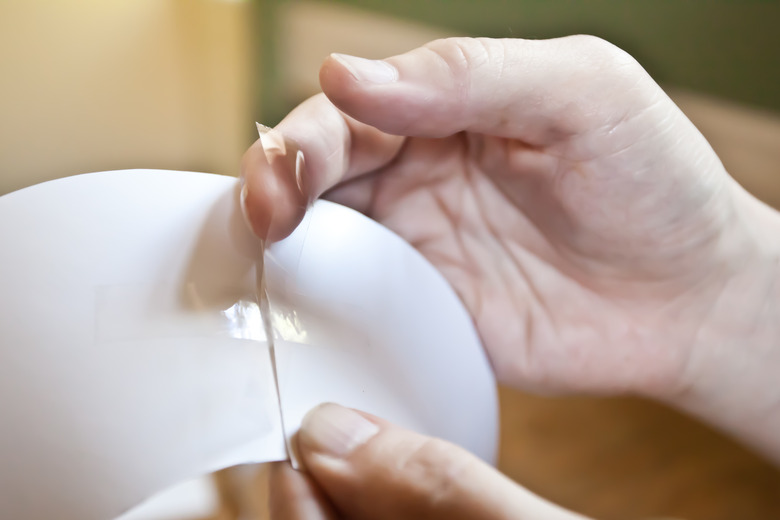
Use scissors to cut out your circle. Cut a line down the radius of the circle.
Set your compass to half the collar measurement. Draw a circle in the center of your cardboard or foam sheet circle. Cut out the center circle.
If you are using the cardboard as a pattern, lay it on the foam sheet and cut out the foam sheet. This foam cutout will be your soft cone. If you are drawing directly on the foam sheet, continue with the next step.
4. Create the cone shape
Fold the large circle into a cone shape and use colorful duct tape to secure the edges. You can try regular tape, but duct tape sticks to the foam sheet better. Alternatively, you can use brads (two-pronged paper fasteners) to secure the cone. If you use brads, make sure the button is inside the cone and the arms are on the outside to prevent the brads' prongs from injuring your cat. (Avoid using staples because these are too sharp).
5. Attach the collar to the cat cone
Use a hole punch and place four to five holes around the inner circle about half an inch (1 centimeter) from the edge. An advantage of using a foam sheet is that the inner edge is soft and not rigid like cardboard or plastic.
Use ribbon to attach your cat's collar to the Elizabethan collar. Weave the ribbon through the holes and the collar. The amount of ribbon you need depends on the size of your cat's neck. Tie the ends of the ribbon together to hold the collar in place. Pretty ribbon adds color and a bit of whimsy.
6. Attach the collar to the cat
Insert your cat's head through the hole at the bottom of the Elizabethan collar so the wide end points toward your cat's nose.
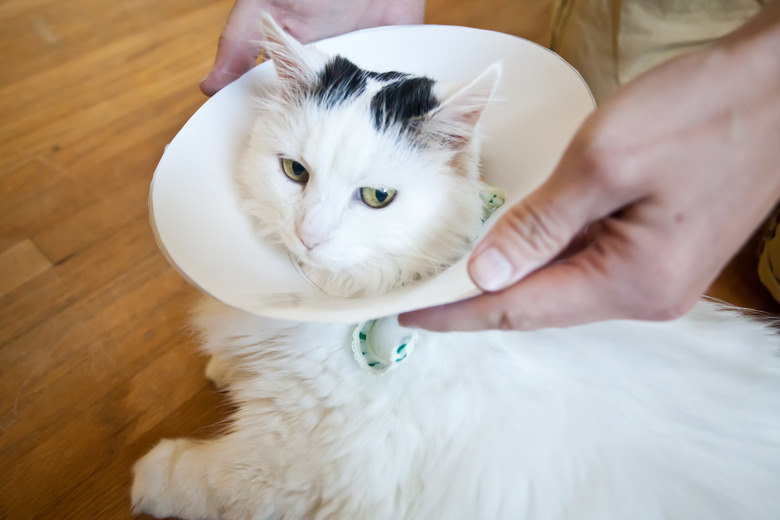
Attach the collar to your cat's neck to keep the Elizabethan collar in place. Tighten the collar if necessary to keep it from slipping off. A correctly fitted cone should be snug, but you must be able to slide two fingers between the collar and the cat's neck. If the completed cone sticks out too far past the cat's nose, trim the cone to be smaller.
Things Needed
-
Tape measure
-
Compass
-
Pencil
-
Poster board
-
Flexible foam sheet
-
Scissors
-
Duct tape
-
Brads (optional)
-
Hole punch
-
Ribbon
-
Cat collar